


Quick Fix for iPhone 5, 6, 7, 8, 9, 10, 11 Charging Port (try before replacing)
Quick Fix for iPhone 5, 6, 7, 8, 9, 10, 11 Charging Port (try before replacing)
Note: I originally wrote this post for my iphone 6. But it should be useful for iPhone 5, iPhone 6, iPhone 7, iPhone 8, iPhone 9, iPhone 10 (X), and iPhone 11. Basically, anything with a lighting port, USB C port, and micro USB port (although some say it’s not as successful with the micro USB ports.
So when my iPhone 6 was only 6 or 8 months old, the charging port started acting up. I should have taken it into the apple store at that point and may have gotten it repaired for free or even received a new phone; but I didn’t think of that… I just lived with it. I thought it was the charging cable at first (and sometimes it was). I would switch out the charging cable and it would work a little better, a little more consistent. But then I started trying out some of devices using the same lightning cables I previously thought were defective; turns out, they weren’t always defective. For the last few months, the only cables that would even charge my device were the original 2 foot cables that came with my phones; and even those had to be in the perfect position. Nothing like unplugging your phone, that’s been charging all day, only to find it has about 5% right before your 12 hour shift!
Assuming I had just prematurely worn out the charger port, I looked at some of the YouTube videos on changing out the port. Looked, overall, like a great way to ruin my phone and waste about 5 hours of my life. So I resigned myself to paying someone to fix it. But being the tightwad that I am, I went back to the some of the YouTube videos again last night, for one last glance, to make sure I din’t want to operate on it myself. Well, right in the comments was someone saying, “Hey, before you go to all this trouble, clean the lint out of your charging port. Mine had more lint than my belly button:)”
Before I go into the how, let me please just make this one disclaimer: be forewarned, you could damage your charging port if you are too aggressive, especially using metal objects. On the other hand, there is a point of no return, and sometimes the charging port just has to be replaced, no matter how good you clean it. It’s just one of those things.
Another piece of advice from a kind commentor (Danny), please turn off your device before probing the charging port or any ports with a metal device. While not a super high shock potential (albeit not impossible), you could possibly short circuit something and fry your device all together if it is on when you shove in a metal object not necessarily designed for your device.
So that’s what I did; I cleaned the lint out and now mine works again, “almost” good as new. I never would have thought a little bit of lint would interfere with the connections but apparently it did. I used all of the tools, below, to fix my phone. I have put the tools in order of least aggressive to most aggressive (the most aggressive, of-course, carrying the greatest potential for damage).
IMG_4337b
IMG_4662
IMG_4656
IMG_4660
IMG_4655
IMG_4342
Note (update 8/29/2019): After I wrote this blog post, I realized there are actual products made for doing this job. I would highly recommend grabbing one of these kits on amazon and some duster cans, below. I would use some of these less abrasive tools and hopefully more lint-free tools first. And as a last resort take a chance with the tooth pic or paperclip. Don’t forget to turn your phone off before sticking any foreign object in it!
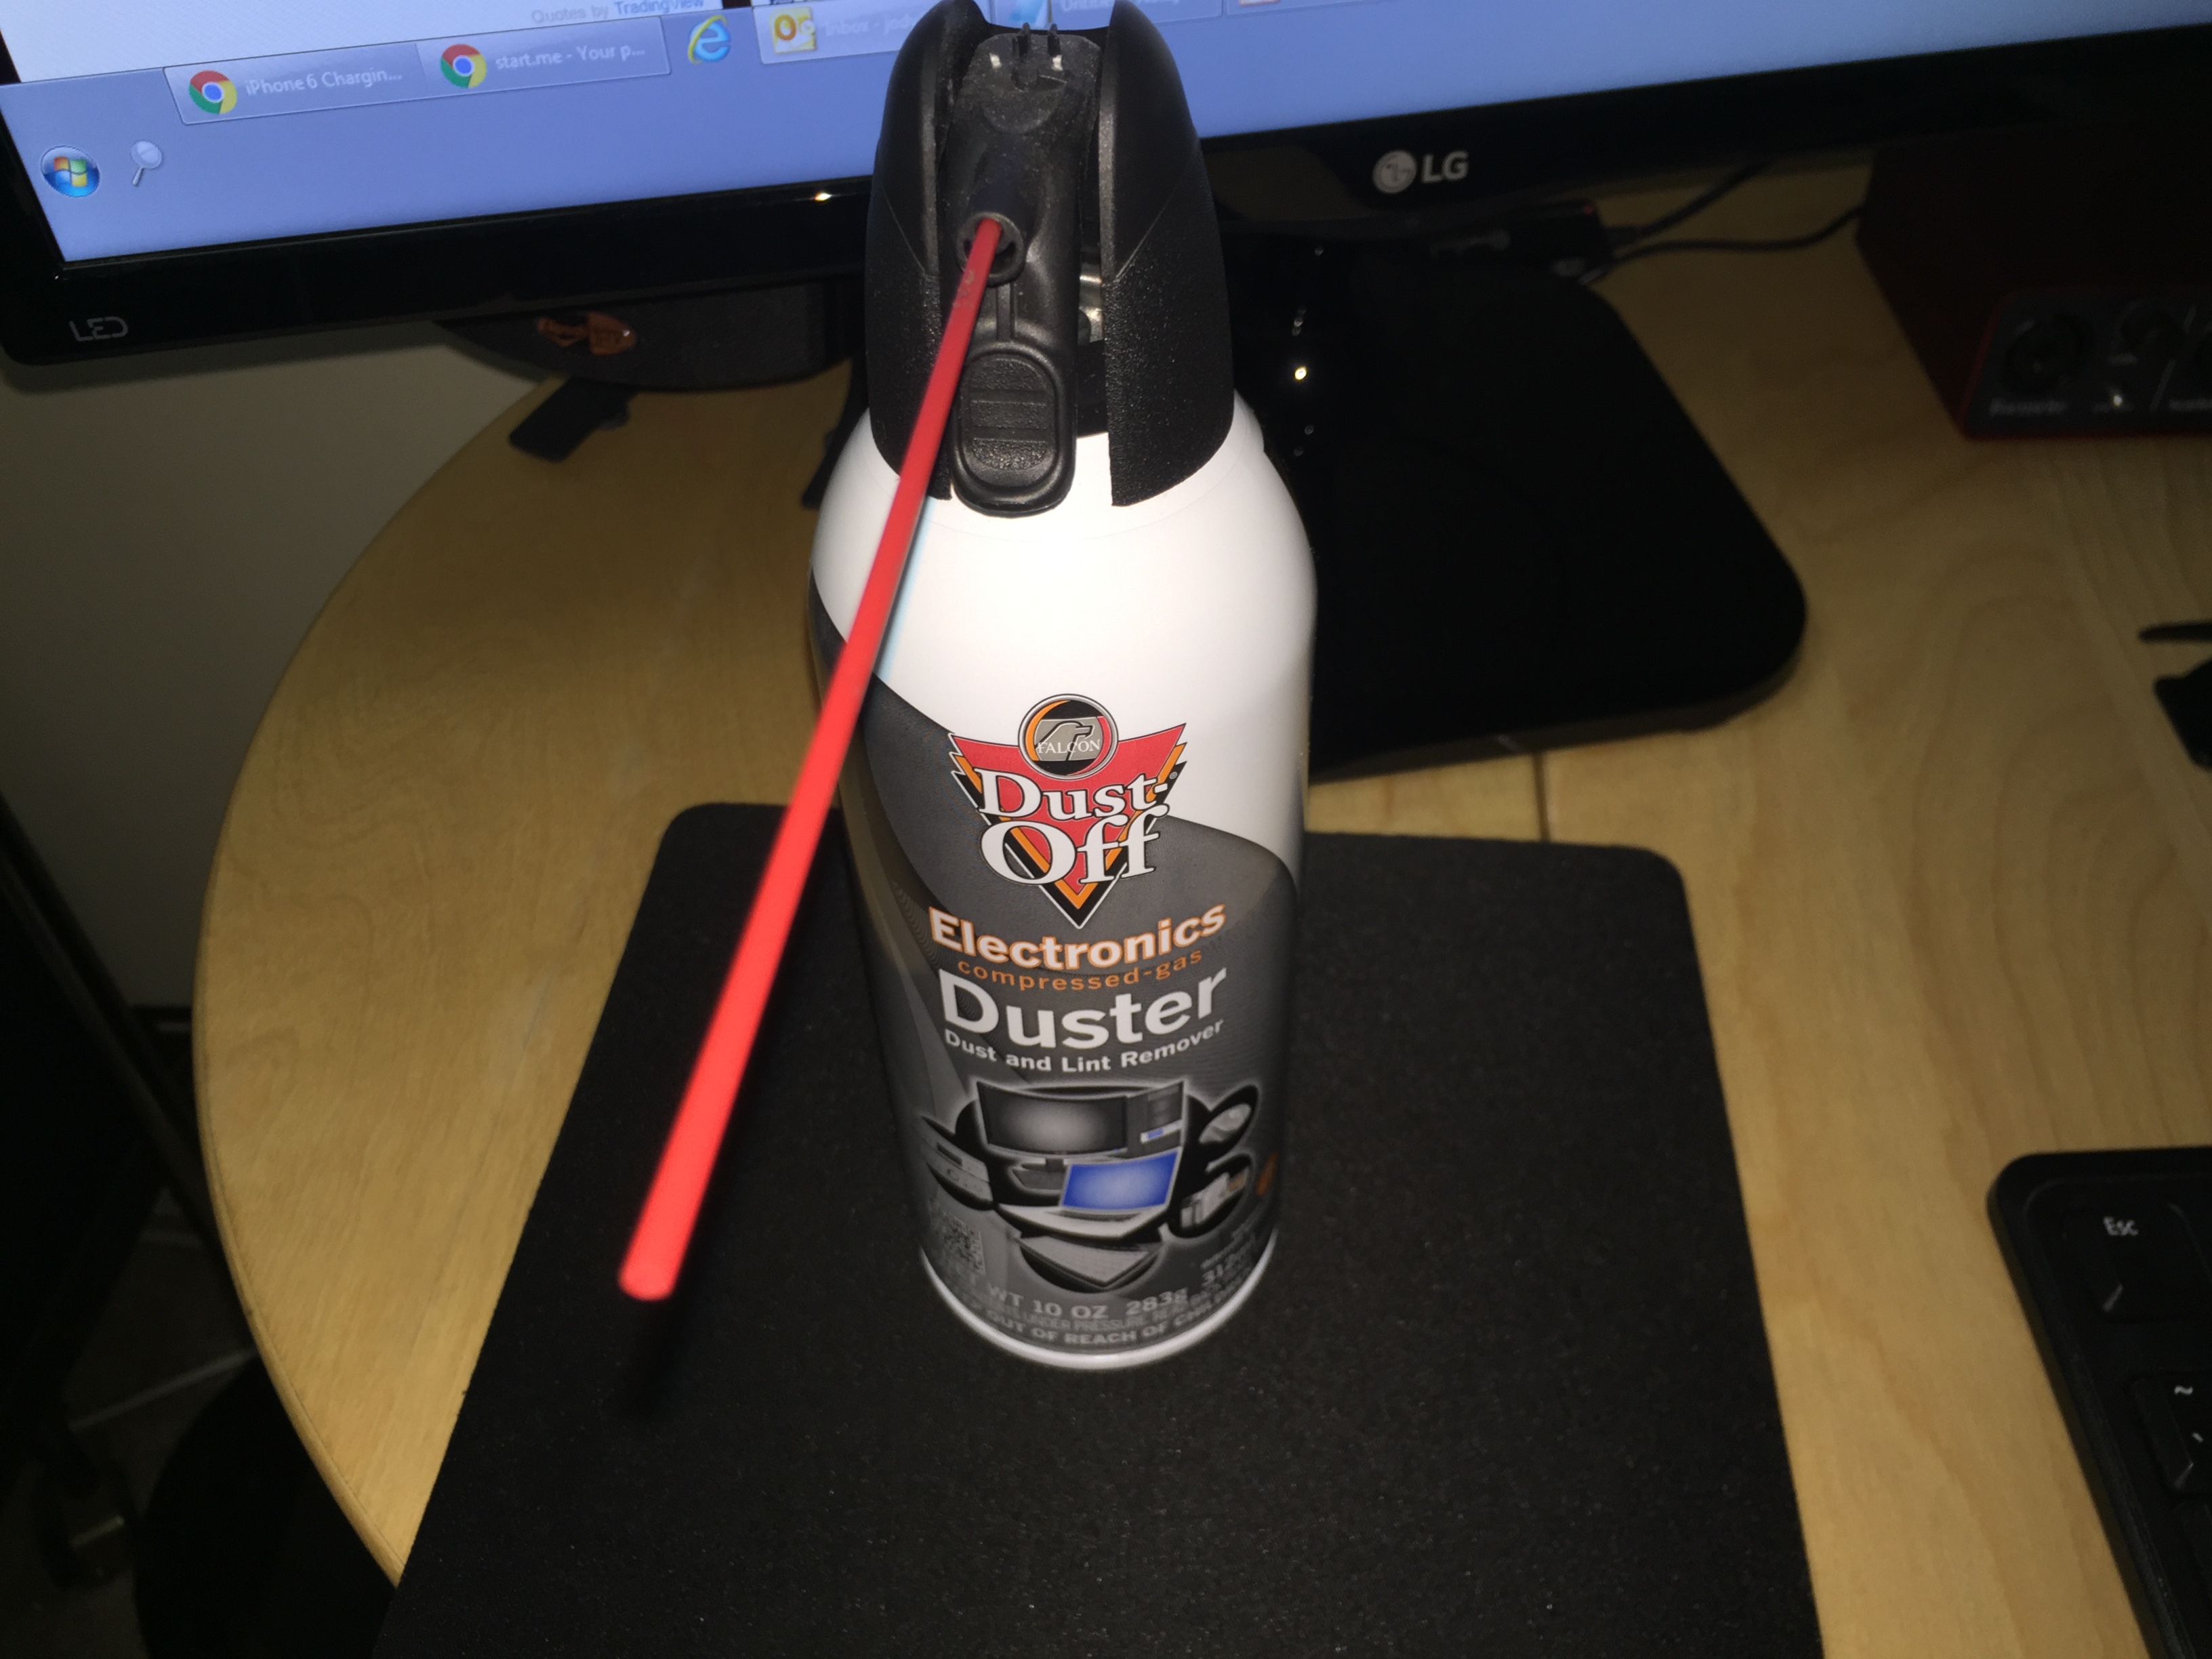
1. I would start with an air duster and try to blow the lent out. Use short bursts so it doesn’t start forming condensation and spraying moist air. This is the most important step because just a little shot of compressed air may be all your phone needs. And if you do have to go a little more aggressive with using probing objects and solvents, the last thing you would want to do is further pack debris into those crevices that could, otherwise, have been blown out by a $5 duster can.
2. Make sure your phone is turned off. And for this point forward, just a disclaimer, proceed at your own risk.
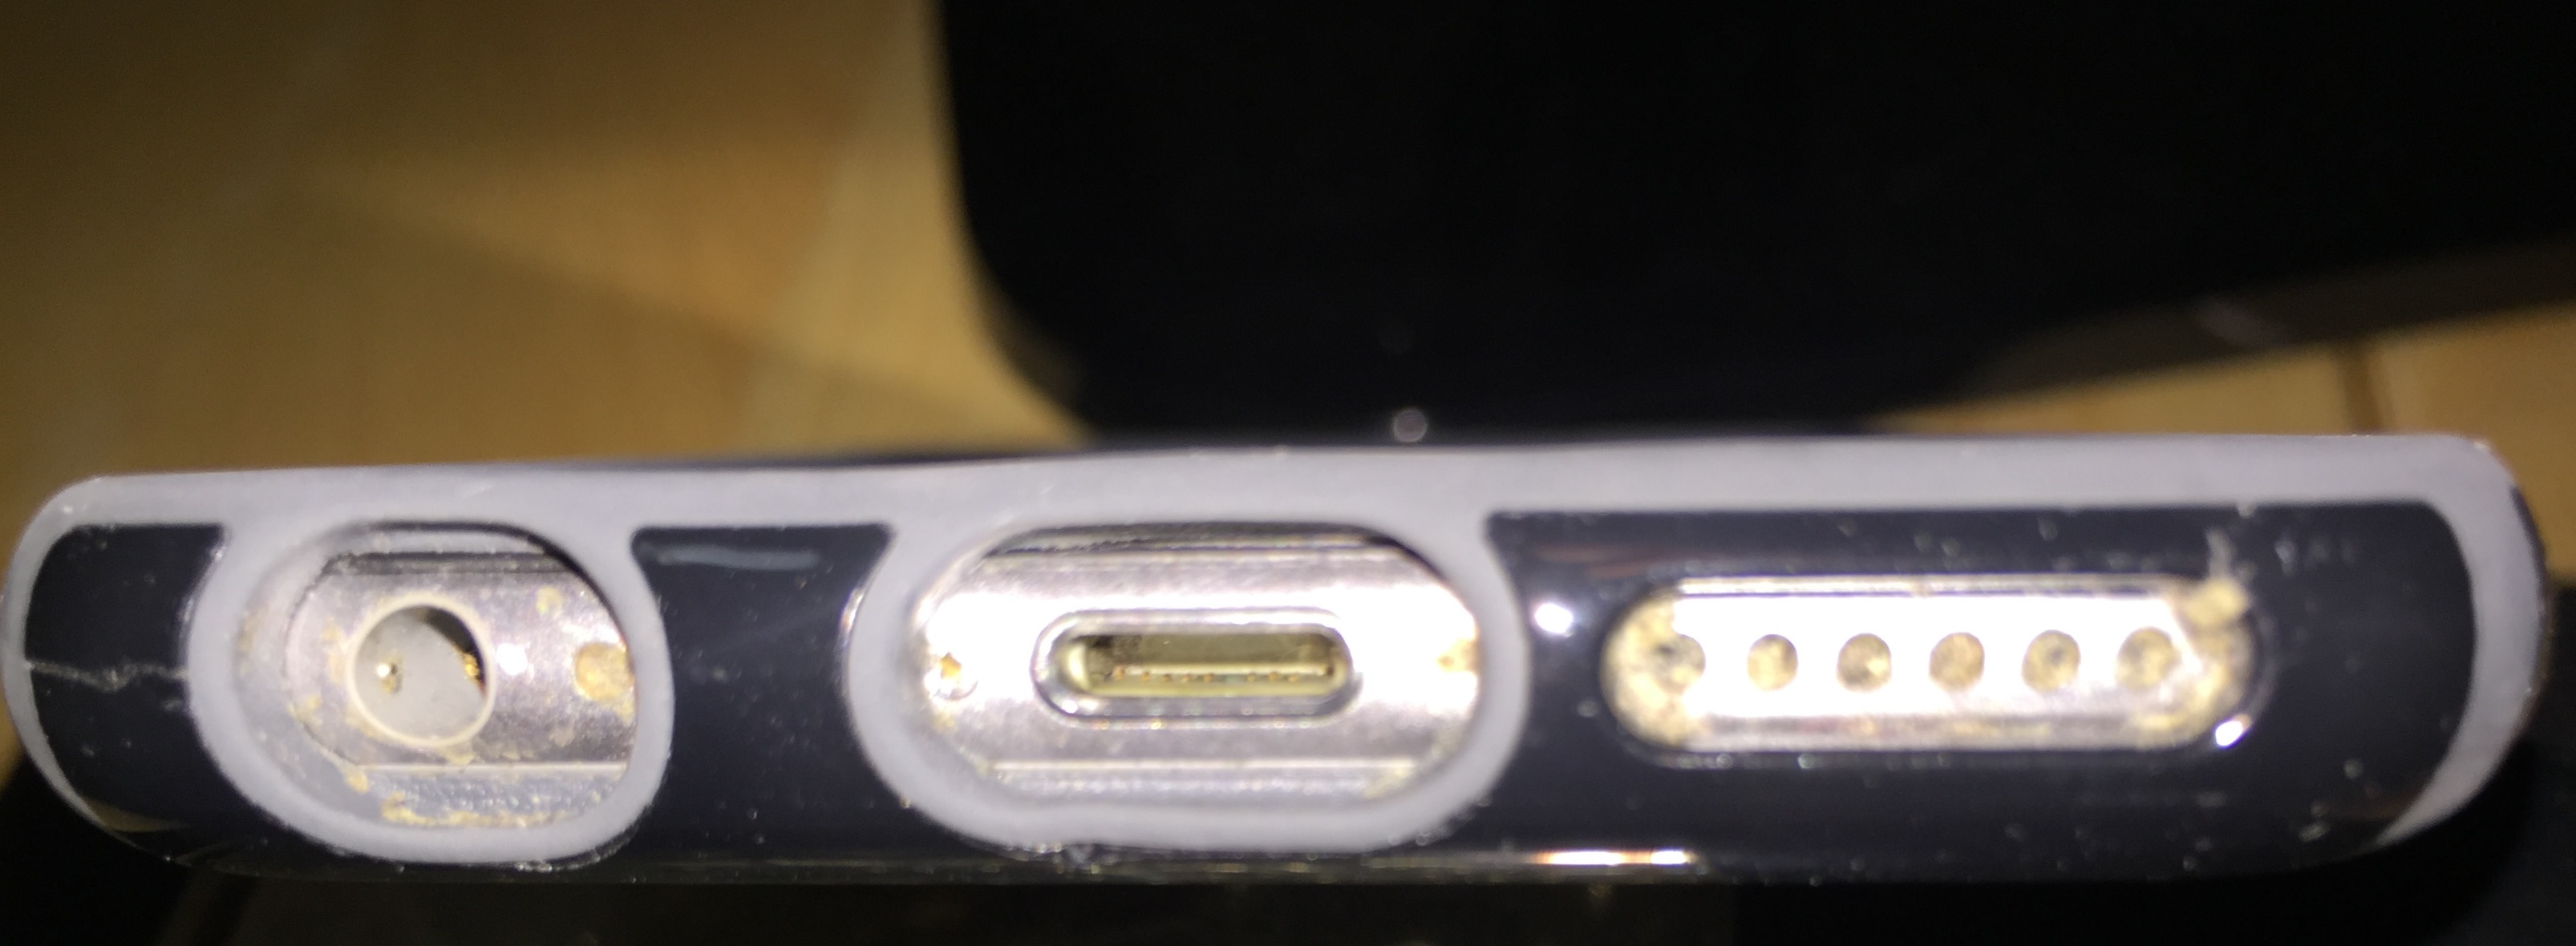
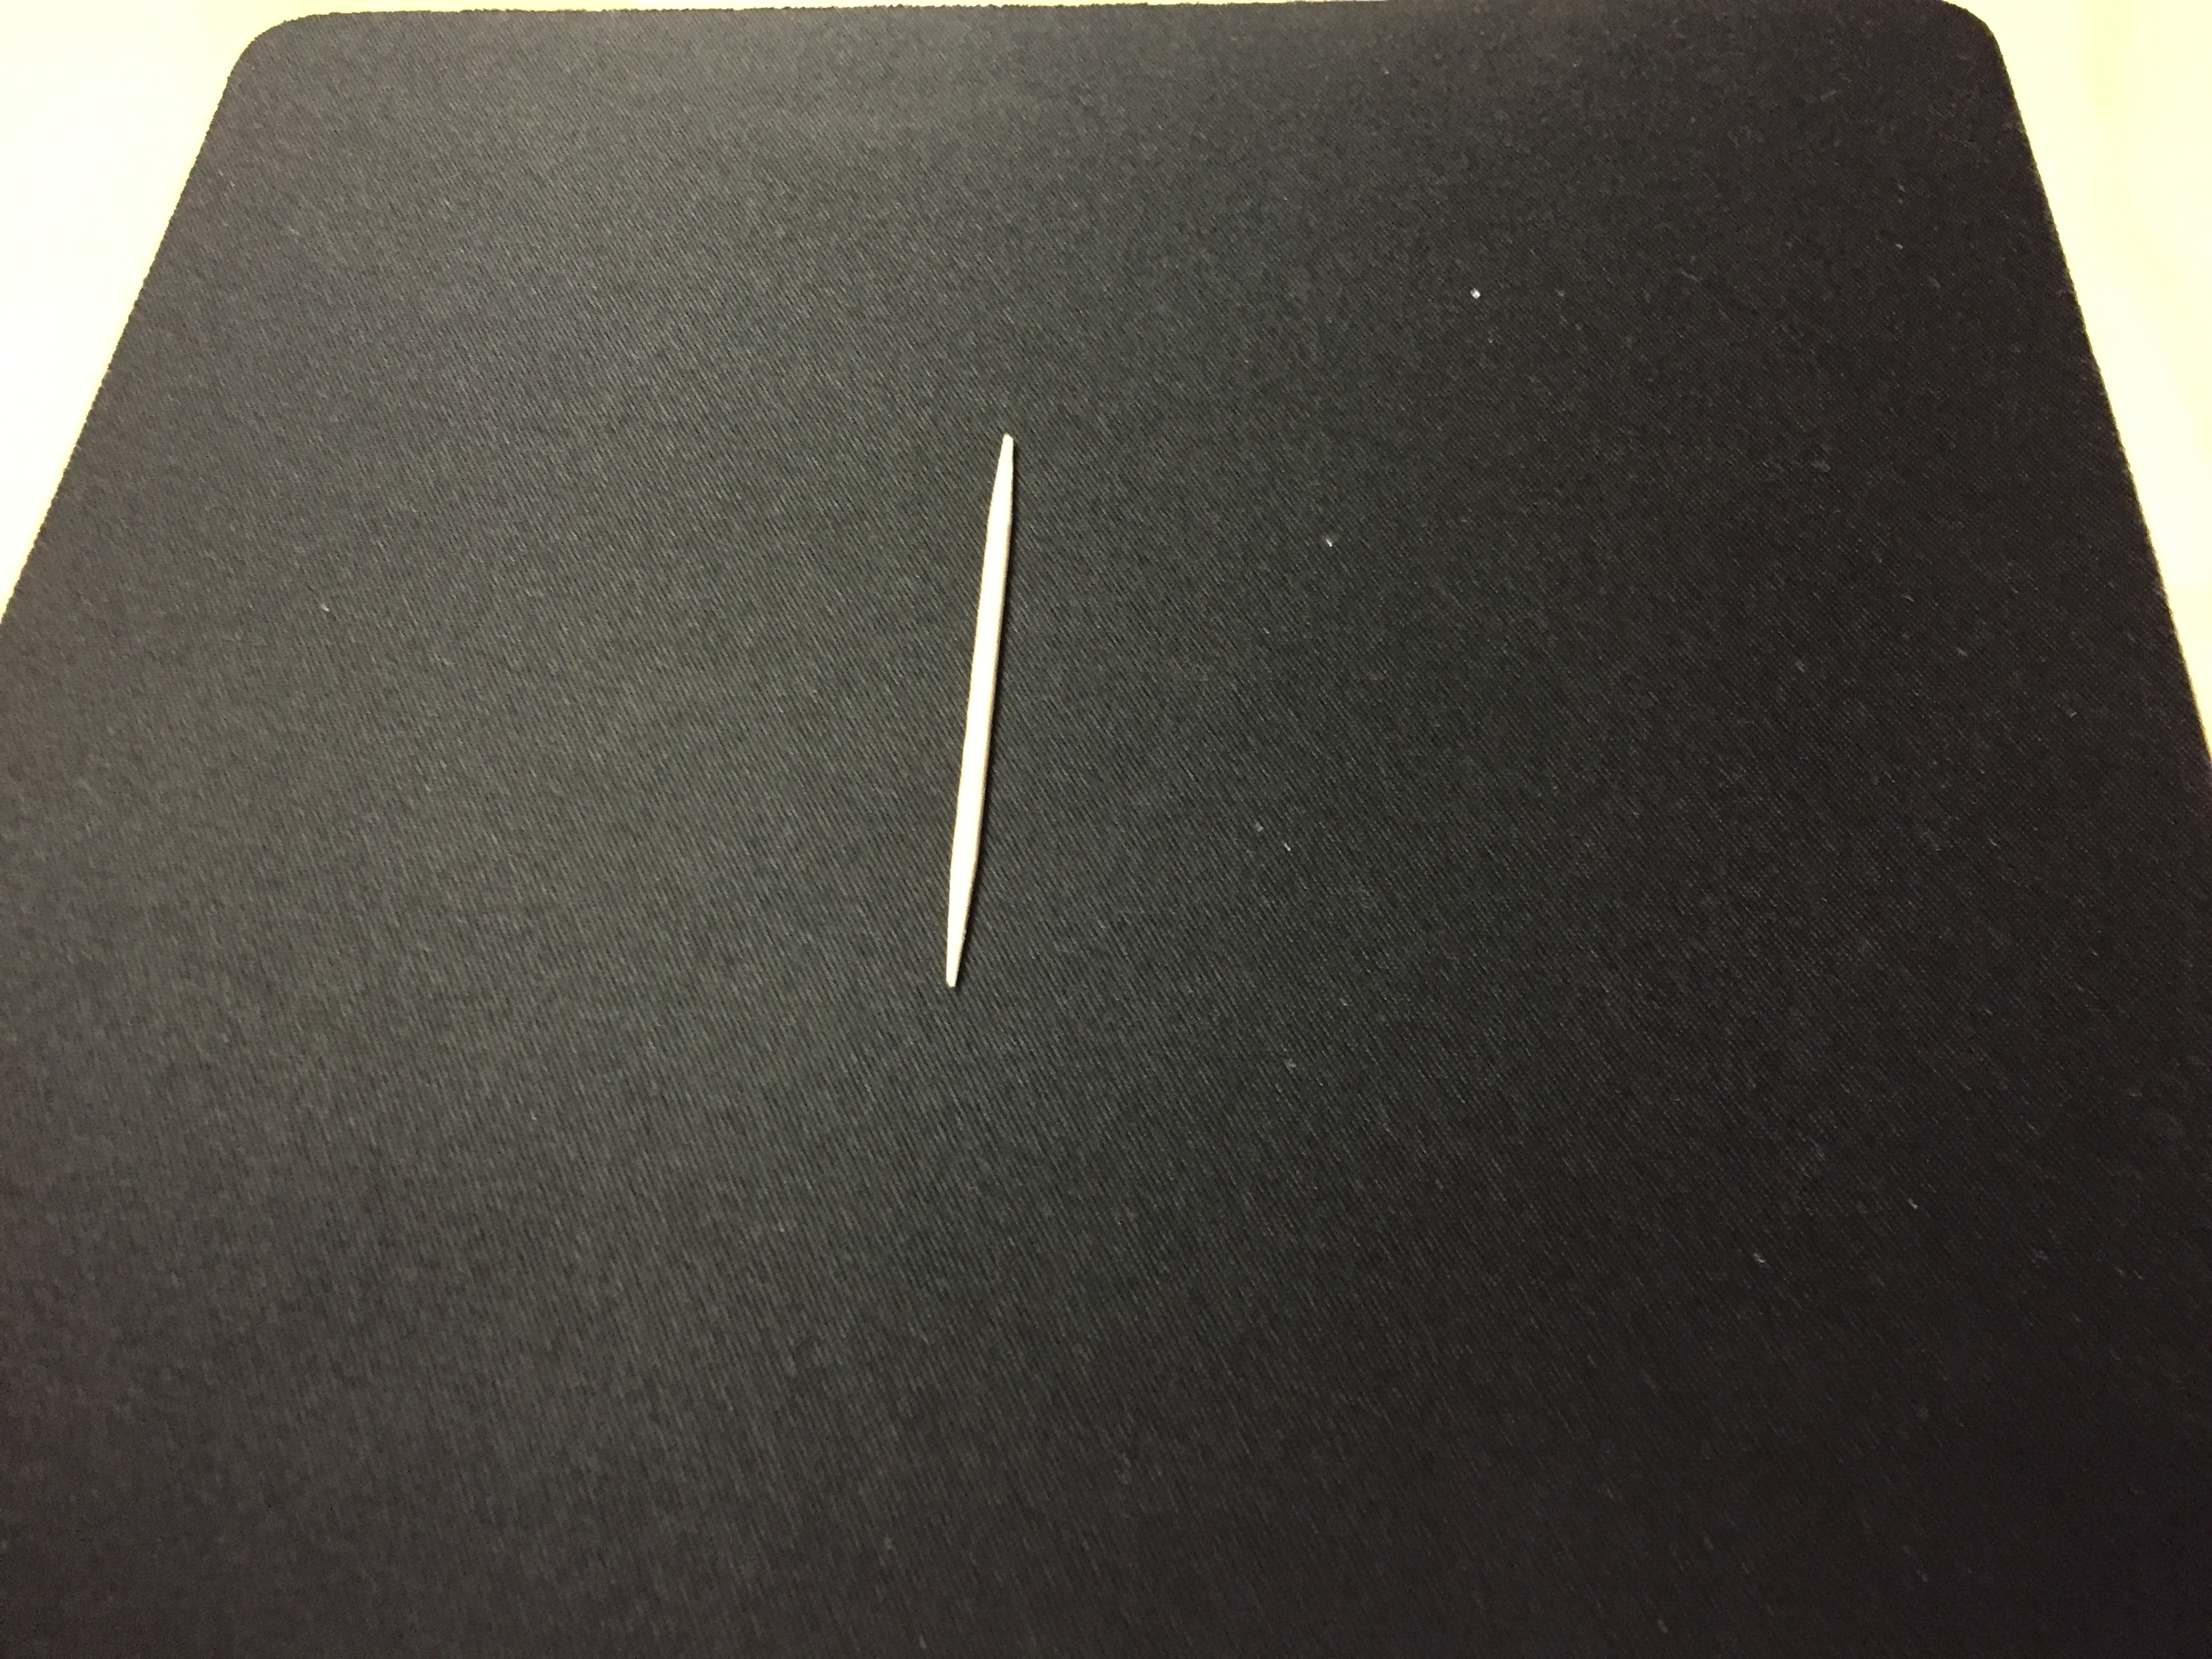
3. If the air duster, alone, doesn’t work or if you can still visibly see lint in the hole, it’s time to go a little more aggressive. If you look closely at the image of my charging port (sorry I only took an “after” photo) you will see some pins or contacts only on one side of the port. Be extra careful around those pints, but pay extra attention to them as well as they will be areas that are more prone to collect lint. Take a toothpick and gently start cleaning around the contacts and the crevices/four corners of the port.
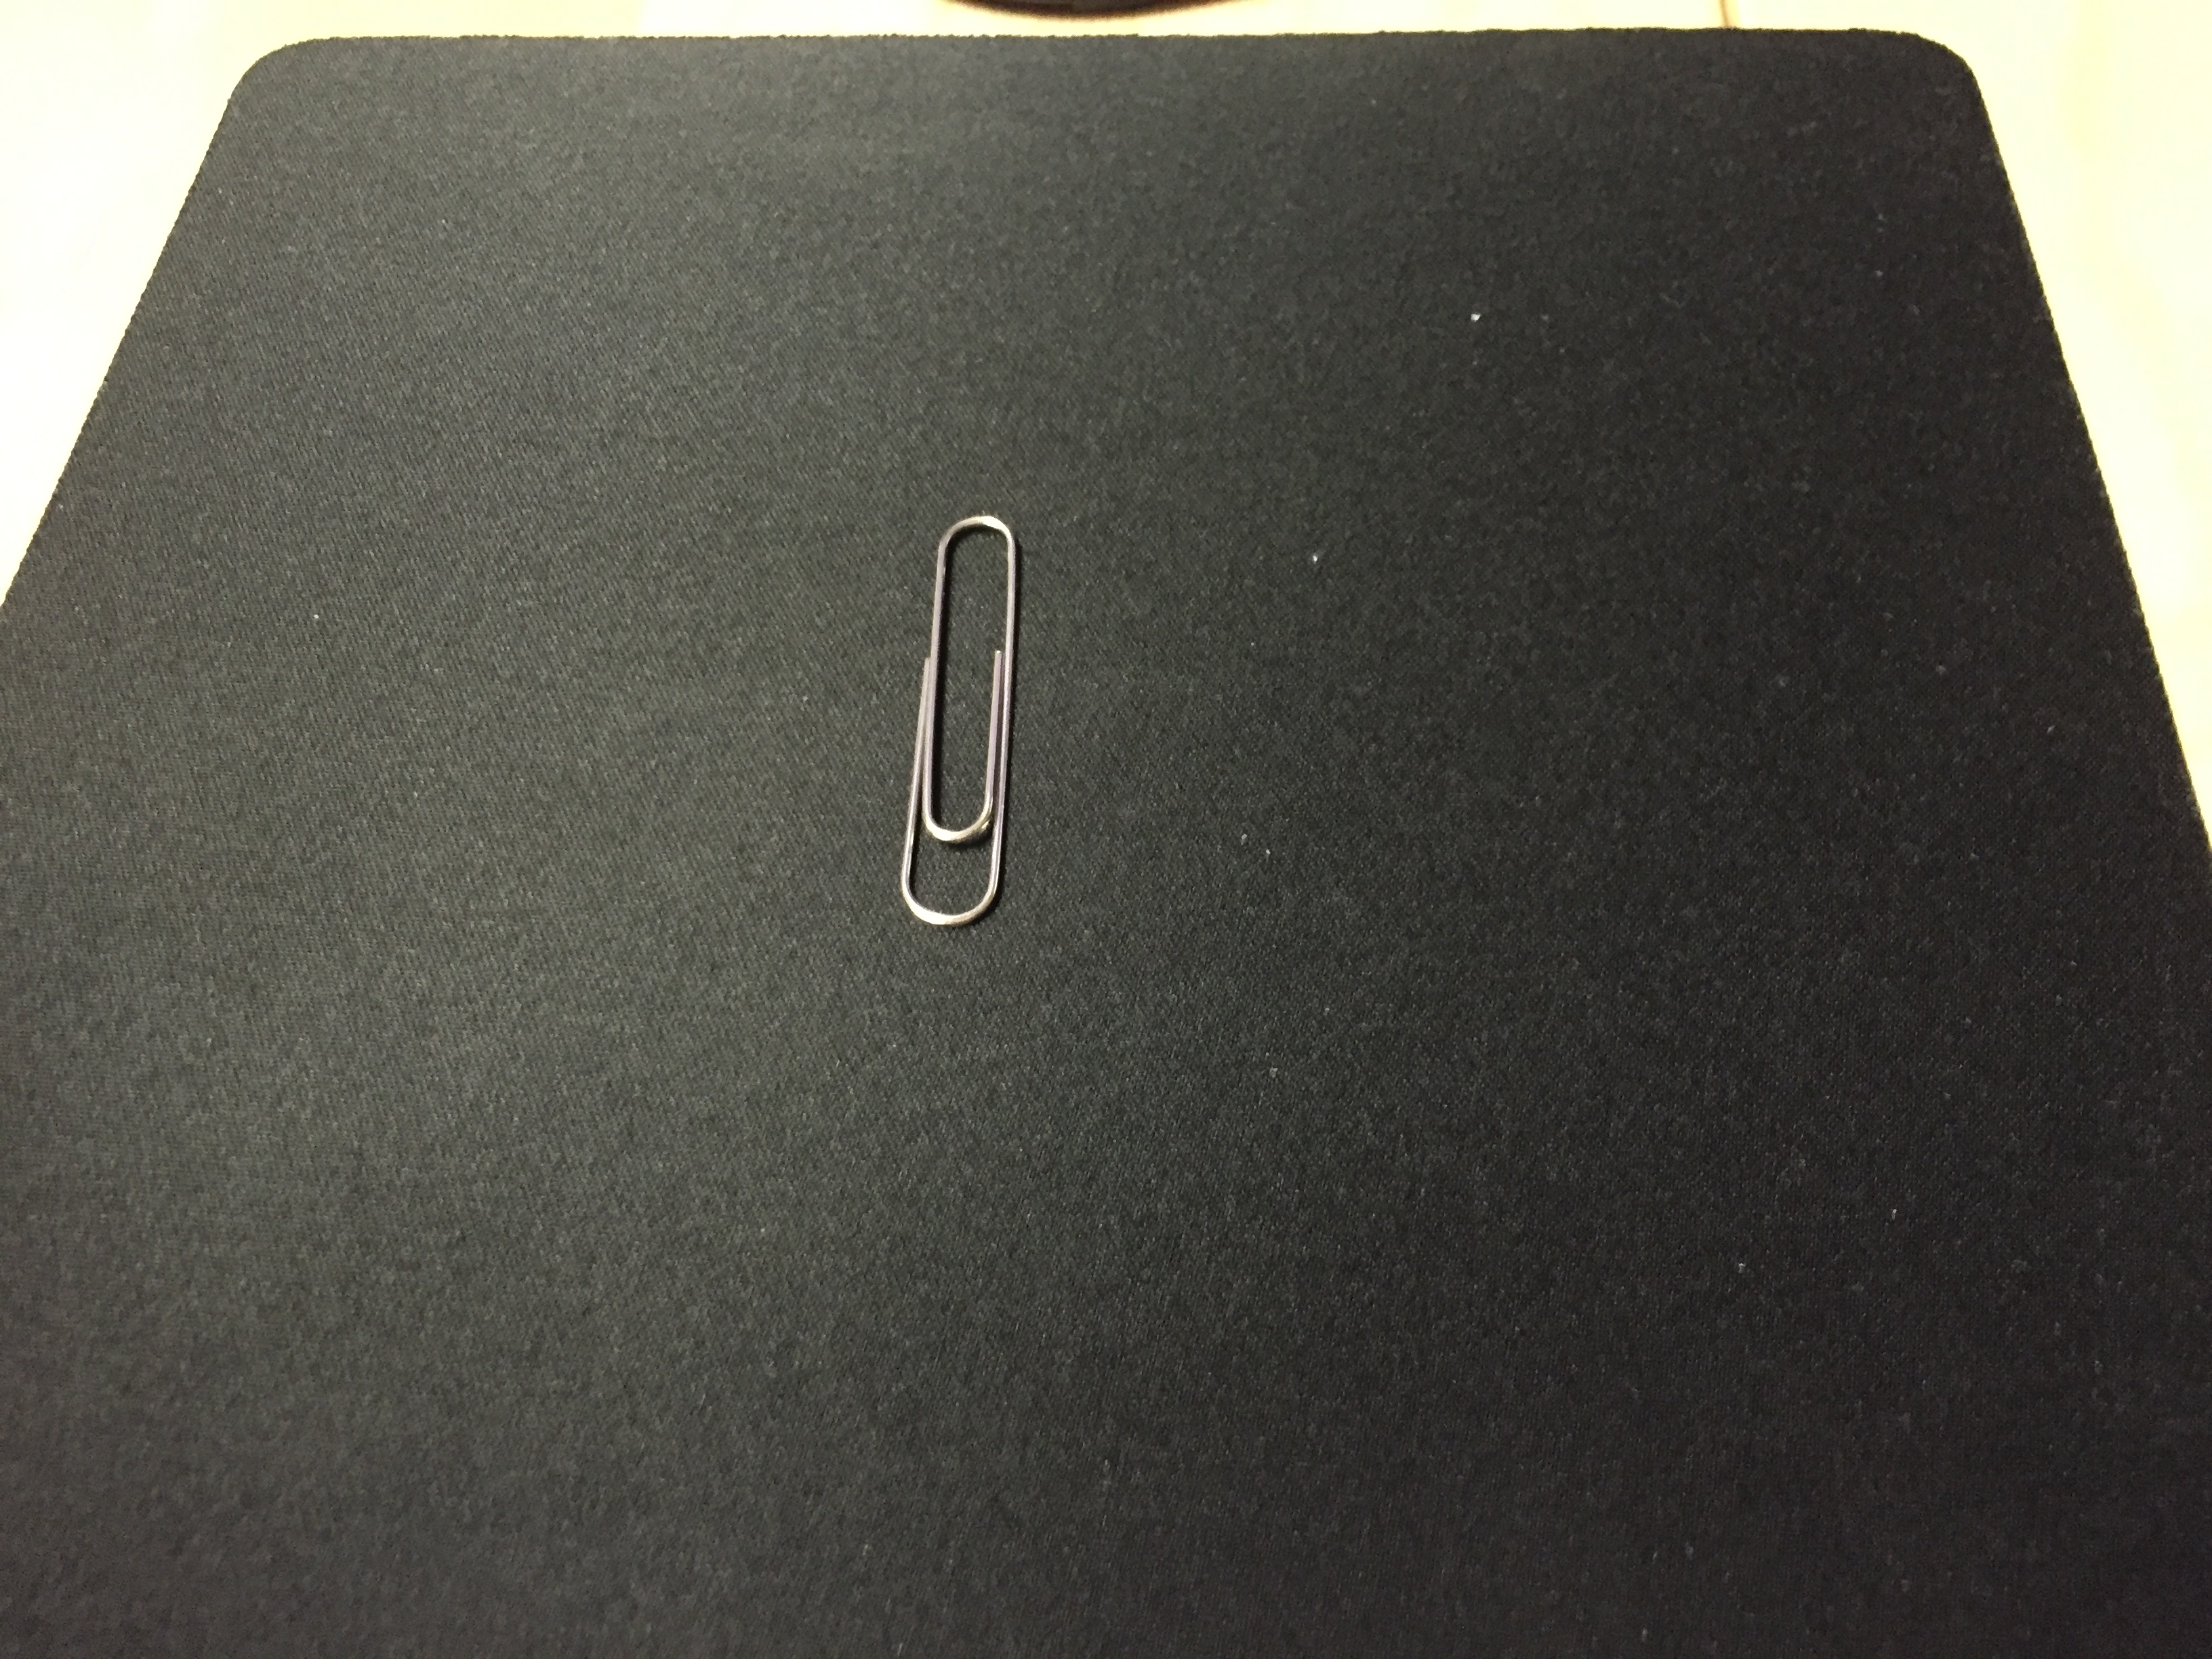
4. If you’re not back in business after the toothpick, time to step it up and use the paperclip. But be even more careful, as the harder object you stick in your device, the greater potential for damage.
5. And last, if you’ve been using your device for over a year without ever cleaning out the lent, you’ve likely left some residue, dirt, and grease on the contacts which could be interfering with the connections. Note: it is possible, that the paper towel method described here, could snag one of the charging point contacts and rip it right out of your port, so proceed at your own risk!
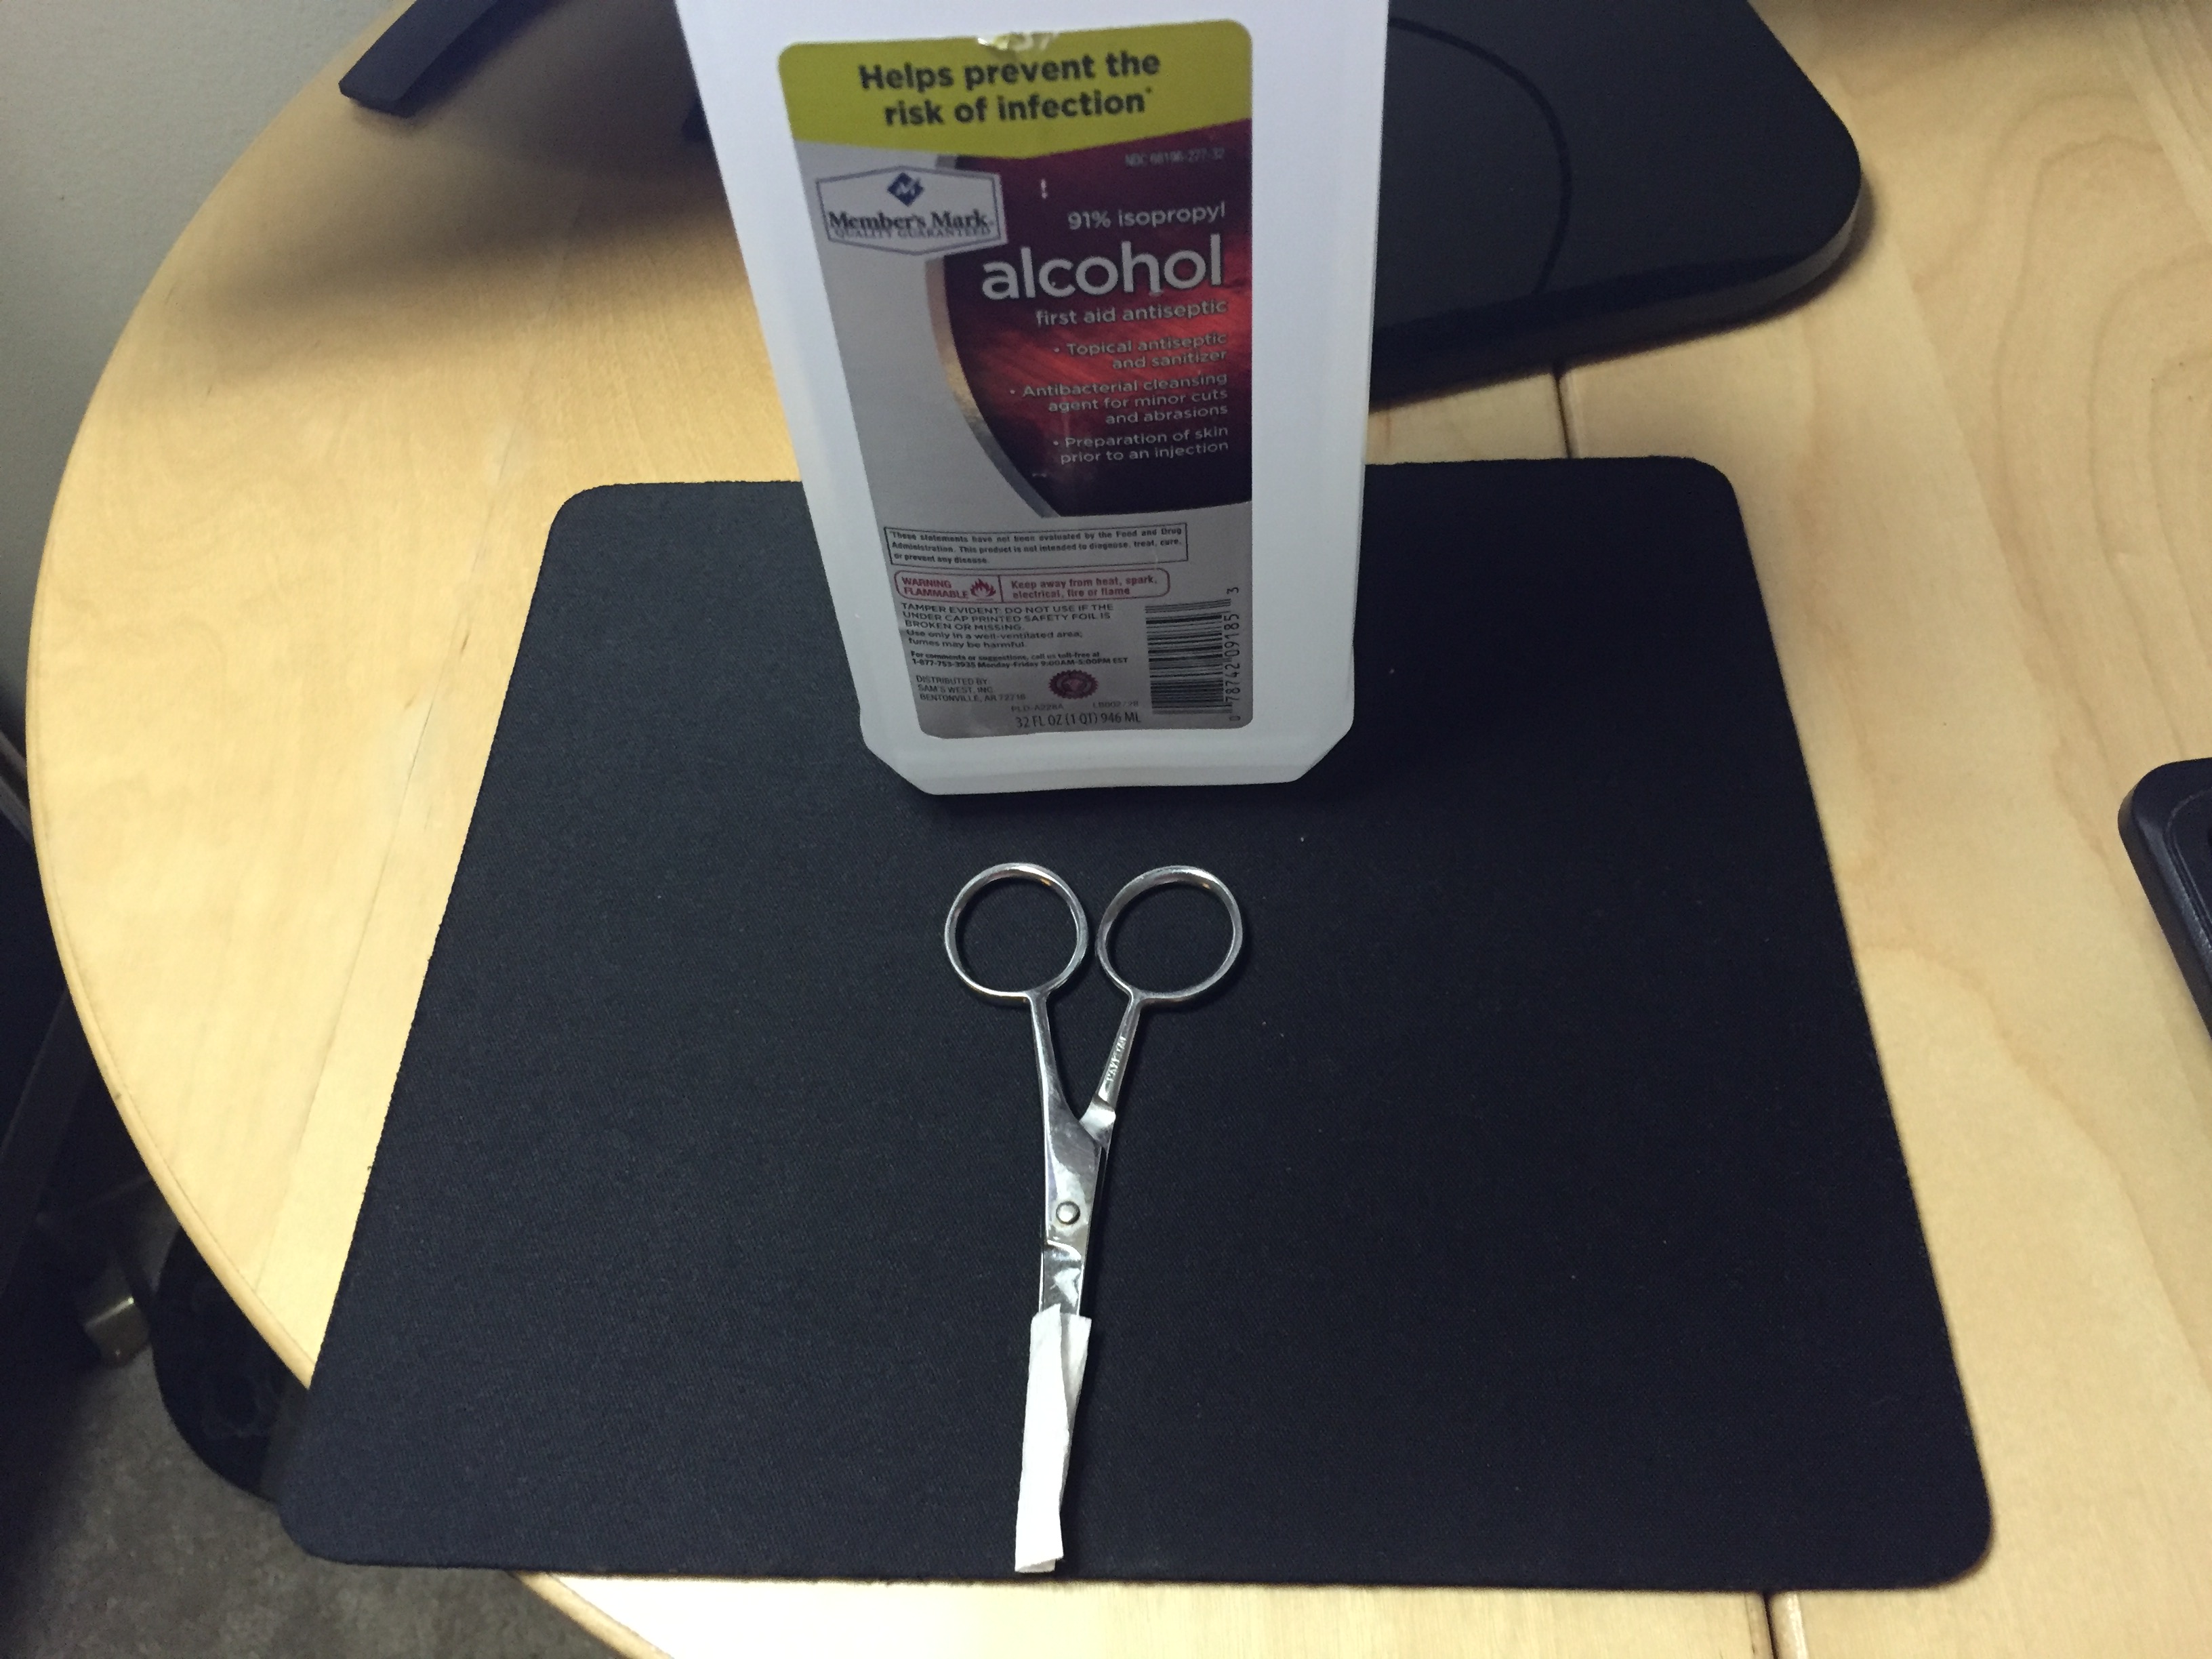
Caveat: I probably would have preferred some acetone which I think has an even lower boiling/evaporation point than rubbing alcohol. But since I haven’t had access to acetone since O-chem lab in my college days, I broke out the rubbing alcohol. I probably would have also preferred some pipe cleaners, but didn’t have any of those on hand either; so I cut up some paper towels.
Back to the procedure: In lieu of some various sizes of pipe cleaners, take some paper towels–preferably the strong ones like bounty towels which also generally come with less lint–and cut some small strips with scissors. Don’t tear the strips or you’ll end up creating more lint and possibly leaving behind more debris to snag on things. After cutting some small strips, fold the strips over a small flat object (whatever you have on hand that will fit in the charging port). After folding the paper towel strips around your instrument, wet it with rubbing alcohol, and take your fingers and mash the edges together tight. Now you can insert the paper towel in and out of the charging port. Mine came out with some blackish, greasy looking marks the first two times.Note: I’ve read some posts that said they purchased some contact cleaner and conservatively sprayed some in the port (may be another option).
6. Probably the next move would be, assuming you didn’t ruin the port in step 4;), to try and even up height of the spring-like contacts on the inside of the port. It looks like there are about 9 or 10 contacts that are just springy/pressure contacts. You’ll need one of those lighted magnifiers, or maybe you can use another phone (in camera mode, zoomed in) to see what you are doing. And you’ll need something really small like a needle. You’ll need to identify the contacts that are bent down too much, and pry them up a bit so that all contacts are making a firm connection with the lightning cable male end. The trick, of course, will not be pry the contacts with so much force that you break one off.
The end result, after thoroughly assaulting my device (with steps 1 -4), it’s now charging much better now (almost good as new). I tried one of the 6′ aftermarket cords that had stopped working, and it now worked again. The short factory cord that came with my device–which had become temperamental–now works 100% of the time, but only with one side facing up (explain that one!). Note, on another iPhone 6, both cords work flawlessly (explain that one!).
So my charging port isn’t quite 100% yet, but at-least I can reliably charge it now. Hopefully this solution will help you as well. In the future, don’t forget to blow out the port more often with a duster can.
Note (update 8/29/2019): When I wrote this blog post, I wrote it while trying to fix my iPhone 6. That was 3 years ago. Now I still have my iPhone 6, but my main day-to-day driver is my iPhone X. I’ve had it a few years now. And guess what, I’m having some of the same lighting plug issues, reminiscent of my iPhone 6.
The crazy thing is, however, I could have prevented this by placing a silicone plug, early on, in the lighting port when not using it. This would have been too much of an inconvenience with my iPhone 6, but with my iPhone X, since I rely 99% of the time on wireless charging, I rarely use the lightning port. But when I need it, (i.e., occasionally using my phone while needing to charge, or needing to sync my phone with iTunes) I really need it at that moment and time! I’ll put a link to a cleaning/combination plug kit below (the first image below). By the way, this kit, seems to have everything the kit, above, has except for the ear plug cleaning too (which I can do probably do without), and the cleaning cloths.
I will also put a link to my favorite car mounts. I drive an older truck so there are not too many places to mount my phone; therefore, I’ve gone with the suction dash mount which has worked well for me. For the last few years, I’ve been using the iOttie Easy one Touch Wireless Qui Fast Charger (the second image below). Note: it this is their older model which doesn’t have USB C capability. And I wouldn’t really call it a “fast charger” in my experience. But it at least maintains my charge and maybe gives me a few percent during my 20 minute commute to work while using Waze which can hog your battery a bit. That is below.
But if you don’t need wireless charging, you can get the iOttie Easy One touch 4 (the third image below) for a little cheaper.
To your success,
Compliance disclosure: “As an Amazon Associate I earn from qualifying purchases.”
(I'm also very humbled and grateful to my website visitors & Amazon for these earnings!)
32 Comments
Submit a Comment


Disclaimer: Segments Below in Preliminary Stages
I recently redesigned my site. The following segments, below, are in the very early developmental stages. Most Link away from my site at this time; but in the near future, I will redirect the links back to my site for an expanded post & resources on each topic.
Free Blog Installation
Now you have no more excuses. I will install
your WordPress for free (the catch explained)
Recent Blog Posts
See Our Latest Content!
(Fresh Off the Press)
Learn to Day Trade
98% Lose Money. Be in the Profitable 2%.
Free Day Trading Course (Review Dork)
Traditional Education
I will tell you the fastest way to get to $200,000 per year with just a Master's Degree
Ecommerce
Dream of launching a million dollar seller? Choose your Weapon (Amazon or Shopify)!
Learn Options 1
You thought you couldn't afford Amazon Stock? Think again!
Coming Soon: Lotto Pools
I'll discus the bi-weekly CA lottery work pool I've been running (without WP) since July 2018.
Learn Affiliate Marketing
Free Program and Course. This is not Network marketing or MLM! Very Legit!
Coming Soon: Integrity
Coming Soon: I will talk about my rise and fall through a top tier membership program.
Making an Impact Across the Globe
Every time somone turns on their computer and clicks a link in a search result, some person is making a profit. That person is known as the middle-man. As long as that middle-man or middle-woman is ethical, they have the best of both worlds. Because the middle man neither has to produce the product or deliver the product; they simply connect products to buyers and earn a worry free commission. The beautiful part of this is you can be that go-between individual from anywhere in the world where you have a computer and internet connection.
Reach Us
We want to hear from you!
Southern California (Orange County)
(800) 949-2928
admin@jodyheath.com
Thanks for the tip! I was ready to take my iPhone 6 into a repair shop because it had stopped charging completely. Instead of a paperclip I used one of my wife’s bobby pins because the tip is less abrasive, and it worked! There was a ton of lint crammed in the charging port that I had no idea was in there.
Hey Michael, I’m with you on the bobby pins. I agree, anything super abrasive should be used last resort. With such, I’ve updated the blog post to include links to some inexpensive port cleaning kits that would have been helpful back in the day. Thanks for chiming in!
Best!
I’ve now had this problem with 2 iPhone6s!
Hacks worked only marginally well for a while, then I had to have the ports replaced.
How much did it cost to get them replaced?
Great ideas. It was beyond what many people talk about was simply a paper clip or toothpick. One thing I missed seeing you though, ; advising people to turn the phone off before messing around with the charging port . I know it seems obvious but …
Thanks for chiming in Danny…. you know it might seem obvious, to power down the device first…. but I have been guilty of taking my phone apart and forgetting to power down. So thanks for the reminder (added it to the post)!
Thanks for the feedback Dave! Sorry to hear it didn’t work. It seems there is a point of no return depending on what is in your port and how packed it is. I’ve updated the site recently. I found some inexpensive cleaning kits on Amazon that might do a better job of cleaning the ports. I found some dust caps as well, but they might be more practical on phones with wireless charging.
Best!
Thank you Jody!
You bailed me out!
I blew a sharp burst of air into the slot, reconnected the cable and Voila! Back to normal!
Freedom of Information at its best!
Thanks for the feedback Richie! Glad yours resolved with just air. I think if one starts using air bursts early on, it may help minimize the damage. I think the lint, if allowed to stay, tends to pack in there too much and eventually there is a point of no return other than replacing the ports. I’ve updated the post recently, if you have any more issues, I’ve listed some inexpensive cleaning kits on Amazon that might do a better job of cleaning the ports.
What a fantastic tip. It worked on my phone so we tried it on my husbands phone that he had totally discarded because it wouldn’t charge an now it’s fine again. Thank you so much.
Thanks for the feedback Anne. You might want to take another look at the blog post. I updated it recently with some inexpensive port cleaning kits from Amazon. May be good to keep around.
Best Regards!
The Apple person said I damaged my pins and should buy a new phone, what can I do?
Sorry to hear that Ruth. There are people who will change out just the charging port for you. Depending on how much they want to charge, that could be cheaper than buying a whole new phone.
Best of luck to you!
Worked for me too !! I got out more fluff than from my belly button .
I was getting ready to strip it down.
Thank you !!
Hey David, Glad it worked for you. I’ve recently updated the post to include some inexpensive cleaning kits on amazon and also some port covers. Apple didn’t think this one through too good (or did they?).
I just want to thank you Jody, you saved me from getting the port fixed. I first used a small paper clip to gently pull out all of the lint (crazy amount of lint) then used the rounded end of the paper clip covered with a paper napkin lightly dampened with isopropyl alcohol and gently inserted in and out a few times. Worked like new after.
Thanks again!!
You’re very welcome Sean. In retrospect, I recently found some inexpensive port cleaning kits and updated the blog post with the amazon links. I would probably recommend the metal objects as last resort, but glad it worked for you!
thanks a ton Jody. You saved me money and a trip to apple store. Both my son and his dad ( me 🙂 ) are happy bunnies.
Regards,
Sripada
Thanks for the comment Sripada! I’ve updated the site recently. I found some inexpensive cleaning kits on Amazon that might do a better job of cleaning the ports. Using metal objects should be last resort.
You are a Legend! Been having this problem for such a long time and it’s been so frustrating… came across this post and used a toothpick, loads of fluff came out and I can now charge my phone properly again.
Thanks a lot! 🙂
Lol, I wouldn’t go as far as legendary, but thanks for the props Lambert; and thanks for visiting my little website! Stay tuned for my next blog post on how to remove belly button lint.
Best!
Thanks for providing this awesome blog about Quick Fix for iPhone 6 Charging Port. Thank you so much for sharing and keep posting.
Thanks Jody. This was a headache for me for almost last 1 year. Problem solved in a minute by my own.
Thanks for reading my blog Gayathra. Best!
Just saved me from the repair shop. Seems like such a no-brained, but never thought of it. Gently used a sewing needle & brought wads of lint out. Thanks a bunch!
Glad i could help Bethany. Take care!
Came across this post while I was searching for places in Knoxville to repair/replace the charging port on my iPhone 6. Tried your tips and it worked great! Used a paperclip, paper towel, and alcohol. So much lint and just buildup came out. Now it works like new! Thank you so much!!
Hey Buddy, glad it worked. All the best!
Hi
so i am always on the look out for a fix before i tackle any job and read on here about lint etc,so after looking at how to change charge port out comes little needle after i turned of phone and carefully flicked out a load of lint that came from the case,couldn’t believe how much,blew out and put cable in ,it felt a better fit hey presto it works,so well done u and thanks very much.BC
You’re very welcome Brian. Glad it worked!
100% Spot on! Thanks for sharing this Jody. My port was *FULL* of lint and even having inspected it with a magnifying head set before reading this I had no idea it was there. I used a wooden toothpick carefully and out came piles of crud which looks remarkably like the lining of my pockets!!!. I now get a positive “click” when I push the connector in (I’d obviously forgotten how it used to feel) and now it connects 100%. Like many people I’d been researching local repair shops and was ready to try contacting them next week when I believe Covid-19 would allow them to re-open.
A big thanks from me too for taking the time to post this. I carry 2 iPhones and they were both playing up and I needed to place the devices up against something for them to charge. A quick Google brought me here and 5 minutes later with a toothpick and both charging points are several balls of fluff lighter and working like new.